
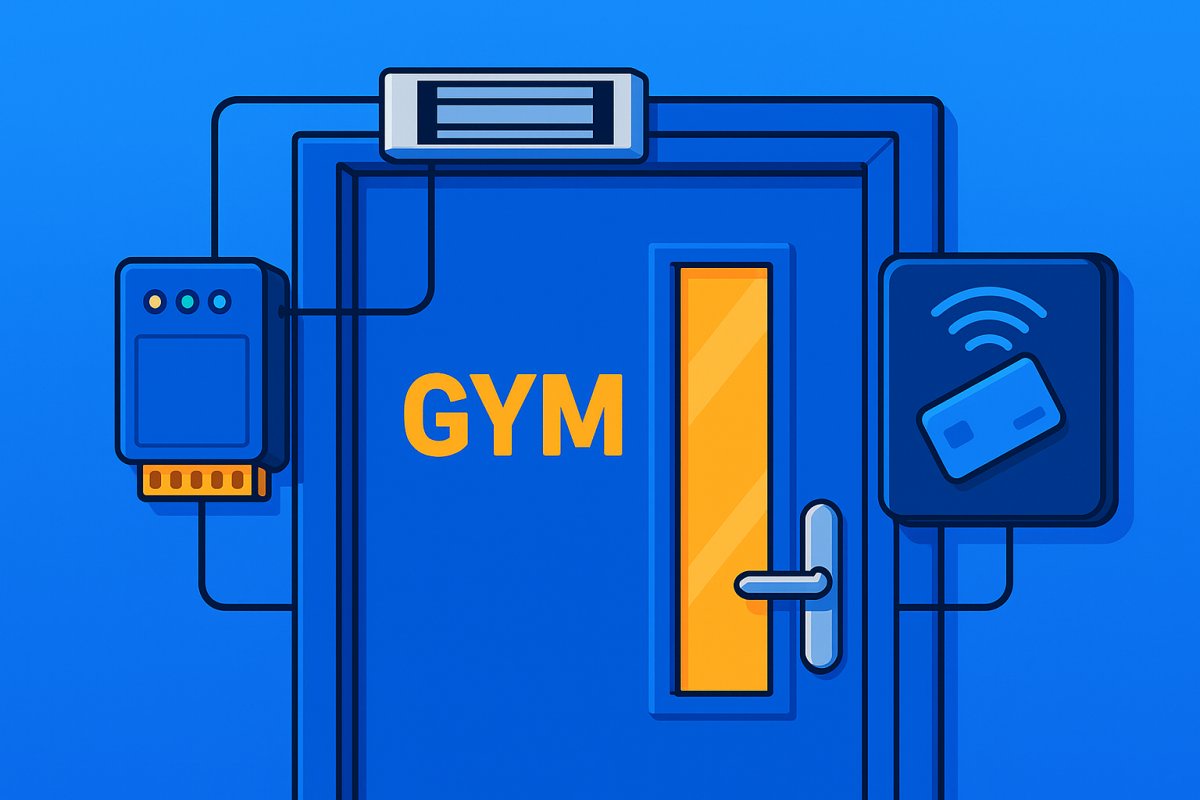

I've installed mag locks at multiple gyms. Here's exactly how it works, what it costs, and how to do it yourself.
The hardware is straightforward. A mag lock, a controller, a reader, and some 18-gauge wire. The part people overthink is the software — making the lock actually know who should get in and who shouldn't. We'll cover all of it.
If you're building out a 24-hour gym, this is the single most important piece of infrastructure you'll install. Get it right and you'll never hand out another physical key.
What a Mag Lock Actually Is
An electromagnetic lock is a big magnet bolted to the top of your door frame. When powered, it holds the door shut with 600 lbs of force. Nobody is pulling that open.
When power cuts out, the magnet releases. The door swings free. This is a fire code requirement — the door has to fail unlocked so people can always get out. The NFPA 101 Life Safety Code mandates this for any electromagnetic locking device on an egress door.
A decent 600lb mag lock runs $80–$150 on Amazon. They're simple devices — two flat plates and a coil of wire. Not much to break.
One exception: glass storefront doors. Mag locks need a flat metal surface to mount against. If your main entry is a glass door in an aluminum frame, you probably need an electric strike instead. Same concept, different mounting. The strike replaces the existing latch plate in the door frame and releases electronically.
Three Components You Need
Every door access setup has three pieces. Here's what each does and what you'll spend.
The Lock
$80–$150
The muscle. A 600lb electromagnetic lock mounts to the top of the door frame. Powered = locked. No power = open. Get a 600lb model minimum — 300lb units exist but they're too easy to force.
The Controller
$100–$300
The brain. It decides whether a credential is valid and tells the lock to release. Connects to your network (WiFi or ethernet) and syncs with your membership software. Some cache credentials locally for offline access.
The Reader
$50–$200
The input. Members tap a fob, scan a card, or use their phone. Mounts outside the door at chest height. Wiegand protocol is standard — it'll talk to almost any controller.
Total per door: $200–$650. Add about $50 in wire, conduit, and mounting hardware. Two doors to cover a front and back entrance? Double the hardware, but you only need one software subscription.
Tools You'll Need
- 🔧 Drill with masonry bits (if mounting to concrete or block)
- 🔧 Wire strippers and crimpers
- 🔧 18-gauge low-voltage wire (two-conductor for lock, multi-conductor for reader)
- 🔧 Screwdriver set (Phillips and flathead)
- 🔧 Level (the mag lock has to be perfectly aligned)
- 🔧 Fish tape or glow rods for pulling wire through walls
- 🔧 12V or 24V DC power supply (match your lock's voltage)
- 🔧 A buddy to hold the lock in place while you drill. Seriously. These things weigh 8–10 lbs and you're mounting them overhead.
Step-by-Step Installation
This is a weekend project for a handy gym owner. First door takes a full day. Every door after that is about two hours.
Choose Your Door
The door needs to swing outward (push to exit from inside). This is another fire code thing. Check the frame material — metal frames are easiest, wood works fine, aluminum storefronts are tricky. The door must have a closer installed. If it doesn't close on its own, the mag lock is useless. A hydraulic door closer is $30–$50 and takes 20 minutes to install.
Mount the Mag Lock
The magnet mounts to the fixed frame. The armature plate mounts to the door. When the door closes, the plate meets the magnet and the bond holds. Alignment is critical. If the plate doesn't sit flush against the magnet, your holding force drops dramatically. Use the mounting template that comes with the lock. Check it with a level. A 1/16" gap cuts your holding force by 40% or more.
Wire the Controller
Run 18-gauge wire from the power supply to the controller, and from the controller to the lock. Low voltage — 12V or 24V DC. No electrician needed. The controller typically mounts in a utility closet, above a drop ceiling, or wherever you can get a network connection and keep it out of reach. Here's a quick video walkthrough of a real gym wiring setup.
Mount the Reader
Outside the door, chest height — about 48 inches from the ground. This is ADA-friendly height too. If it's an exterior door, use a weatherproof reader or mount it under an overhang. Run the Wiegand cable (usually 6-conductor) from the reader back to the controller. Don't run it next to high-voltage lines — interference will cause phantom reads.
Configure the Software
Set unlock duration (5 seconds is standard — long enough to open the door, short enough that it re-locks before anyone else walks through). Set access schedules if you don't want 24/7 access on every membership tier. Your access control software should let you configure all of this from a dashboard. Then test it. Test it 50 times. Tap, open, close, tap, open, close. You want to find the weird edge cases now, not at 2 AM when a member is locked out.
Test Failure Modes
This is the step everyone skips. Don't skip it. Kill the WiFi — does the door still work with cached credentials? Kill the power — does the door unlock (it should)? Run a failed payment through your billing system — does access get revoked? Rapid-scan a fob 10 times in two seconds — does the controller handle it? Test the exit button or request-to-exit sensor from inside. Every failure mode you discover now is one fewer emergency phone call later.
Common Mistakes That'll Cost You
I see this constantly. The gym installs a mag lock and the door doesn't have a closer. Members prop it open, the lock engages against air, and the door just hangs there open all night. A $40 closer solves it.
The armature plate has to sit perfectly flat against the magnet. Even a small gap kills your holding force. Use the template. Use a level. Double-check before you drill final holes.
Wiegand signal is unshielded and weak. Running it in the same conduit as 120V wiring causes interference — phantom reads, missed scans, or total signal loss. Keep at least 12 inches of separation.
People inside need to get out without scanning. A PIR motion sensor or push button on the inside triggers the lock to release. Without it, people are trapped — and you're violating fire code. Some gyms use a push bar that mechanically breaks the bond, which also works.
Not all controllers work with all software. Check compatibility before you buy anything. If your gym management software supports specific hardware, start there. Working backwards from a random Amazon lock is how you end up with equipment that can't talk to your billing system.
DIY vs. Hiring a Pro
DIY makes sense if: you're comfortable with basic tools, your building is straightforward (standard metal door frame, easy wire routing), and you've got a day to dedicate to it. You'll save $500–$1,500 in labor.
Hire someone if: you have a multi-door setup, your building has concrete block walls (running wire through those is brutal), or your fire marshal requires a licensed installer's sign-off. Some municipalities require permits for electronic locking devices on commercial egress doors. Check before you start drilling.
A locksmith or low-voltage contractor will charge $300–$800 per door for installation, not including hardware. For a single front door, I'd say do it yourself. For a four-door buildout with a mix of mag locks and electric strikes, get a quote.
What Software Ties It All Together
The hardware is dumb. A mag lock doesn't know who your members are. A reader doesn't know who's paid and who hasn't. The software makes it smart.
The critical question: is billing tied to the lock? If a member's payment fails, does the door stop working for them? If you're using separate systems for billing and access control, someone has to manually revoke credentials when a payment bounces. At 3 AM, that someone is nobody. The member walks in free.
That's why integrated platforms are the best option for gym access control. ManageMemberships ties billing directly to door access — payment fails, credential gets revoked, door stays locked. No manual step. The same system that charges the card controls the lock.
You also want logging. Every scan — successful or denied — should be recorded with a timestamp. When a member says "I couldn't get in last Tuesday," you can pull the log and see exactly what happened. Was it a denied scan? A network outage? A dead fob battery?
Here's that video walkthrough again showing how the software and hardware connect in a live gym install. If you're comparing options, here's a breakdown of the fob vs. app access question.
Frequently Asked Questions
How much does gym door access control cost?+
Can I install a mag lock myself?+
What happens during a power outage?+
What happens if the internet goes down?+
Do I need a special door for a mag lock?+
Key fobs vs phone access — which is better?+
Does the door lock automatically when a payment fails?+
How long does installation take?+
Ready to Go 24/7?
ManageMemberships handles billing, member management, and door access in one platform. No duct-taping three systems together.